Editing on a mobile phone has been made simpler with our audiovisual editor tool. It is a simple as dragging, dropping & arranging your audio segments to construct your episode. Once you have downloaded the Hubhopper mobile app, you can go though the following steps to edit your podcast.
Step 1: Record Segments
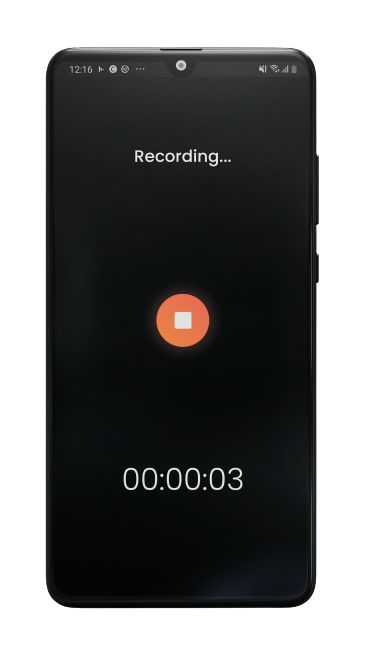
To start recording, you will first have to go to the 'create' page and tap the microphone icon to start recording. Once done, you can rename it and save it to your in-app audio library.
Step 2: Audio Track Edit
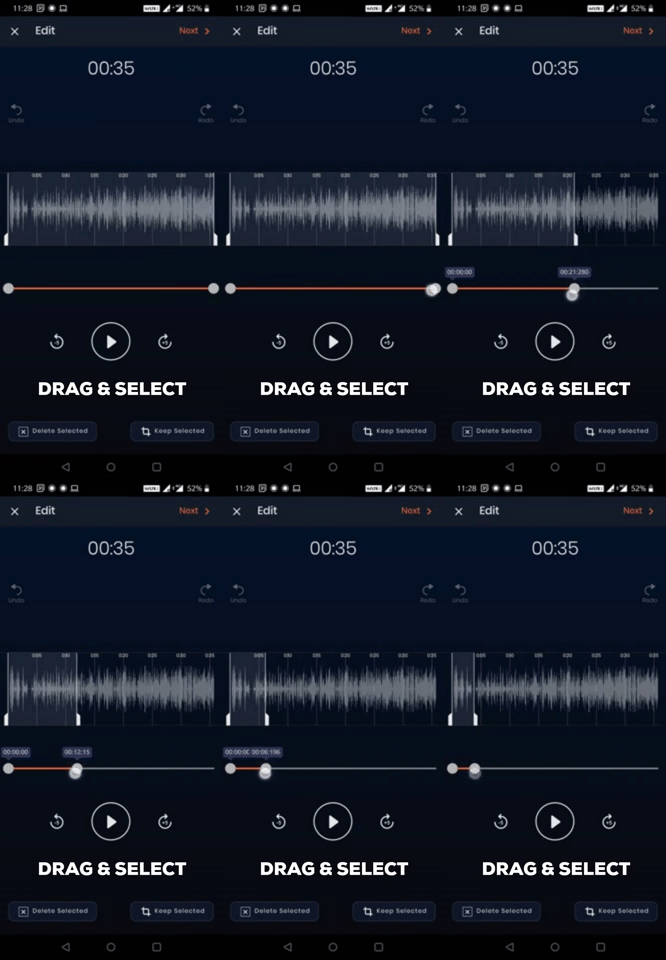
Once you choose to 'continue & edit' your recorded audio file, you will be taken to the audio track editing tool, where you can select which part of the audio track you wish to keep or remove by simply dragging the timeline hands to define the space you wish to work on.
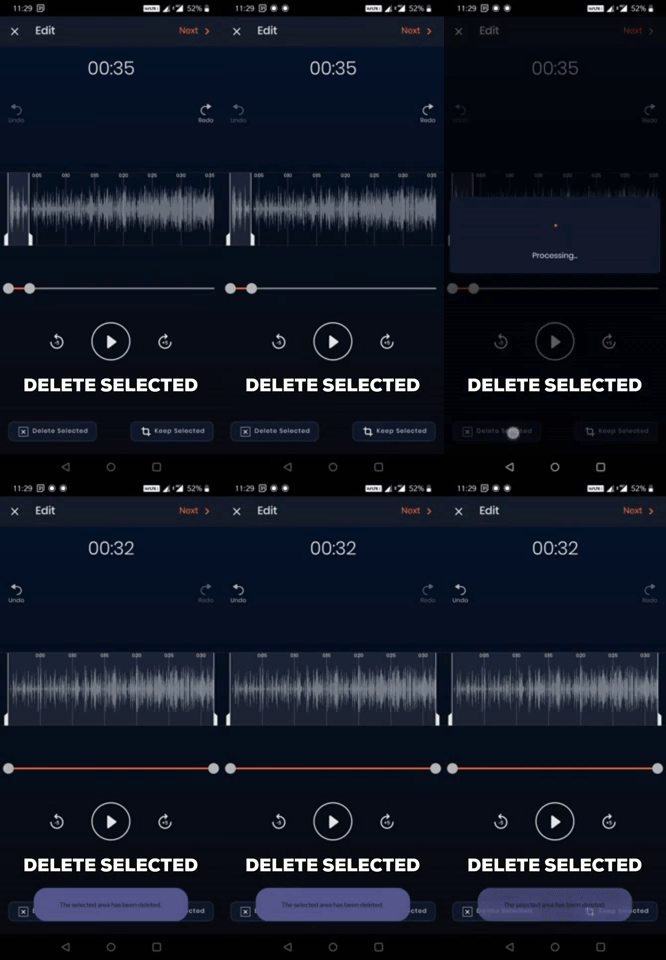
Hit the 'delete selected' to delete the defined workspace.
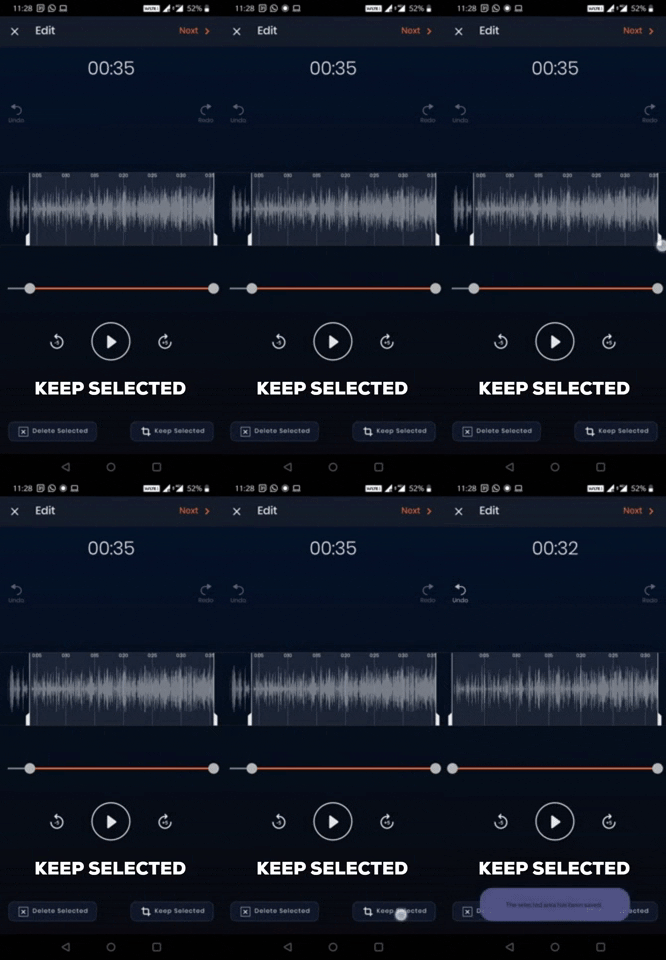
Hit the 'keep selected' to keep the defined workspace and delete the rest.
Step 3: Arrange audio segments
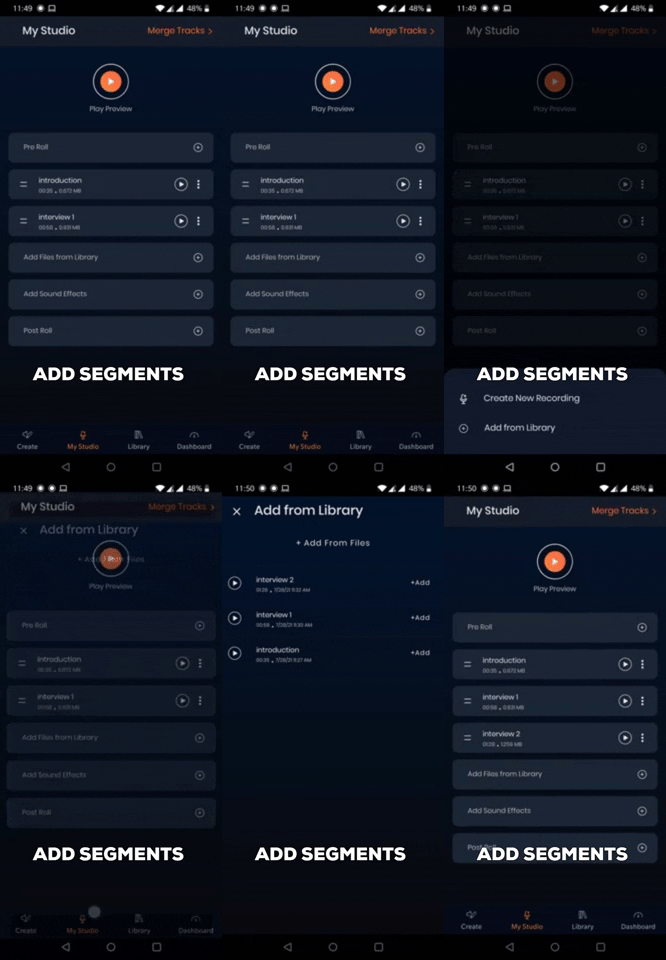
Click on 'next', and you will be taken to 'my studio' page, where you can add more files to the given project.
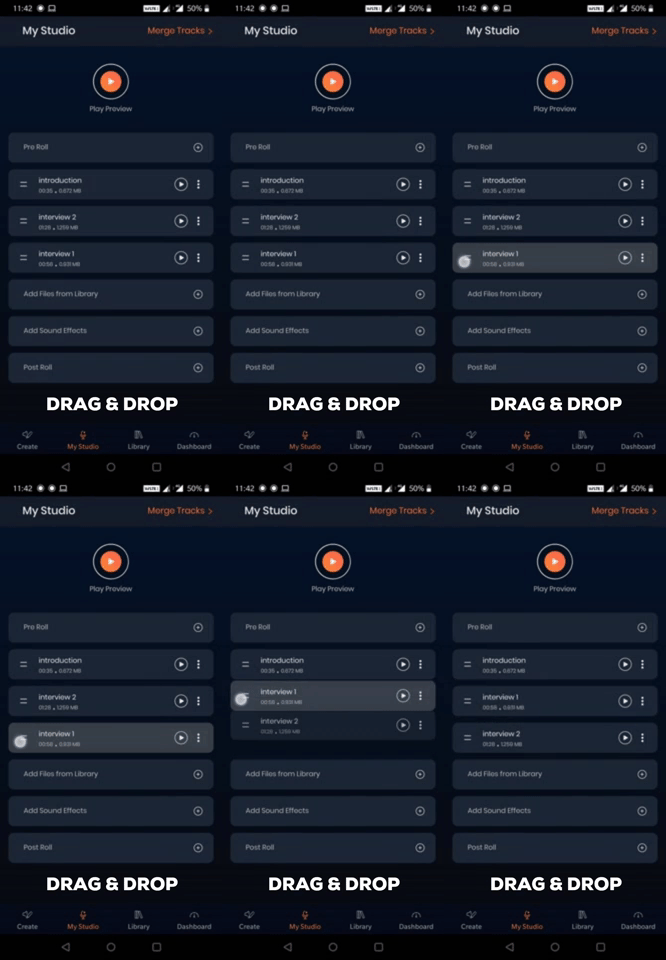
You can also add background tracks & sound effects from the Hubhopper studio in-app audio library. Once done, you can simply tap and drag to arrange the audio segments as per your requirements. You can also individually edit each audio segment as per your requirements. You can tap on the 'play preview' to listen to your project.
Step 4: Add episode details & upload
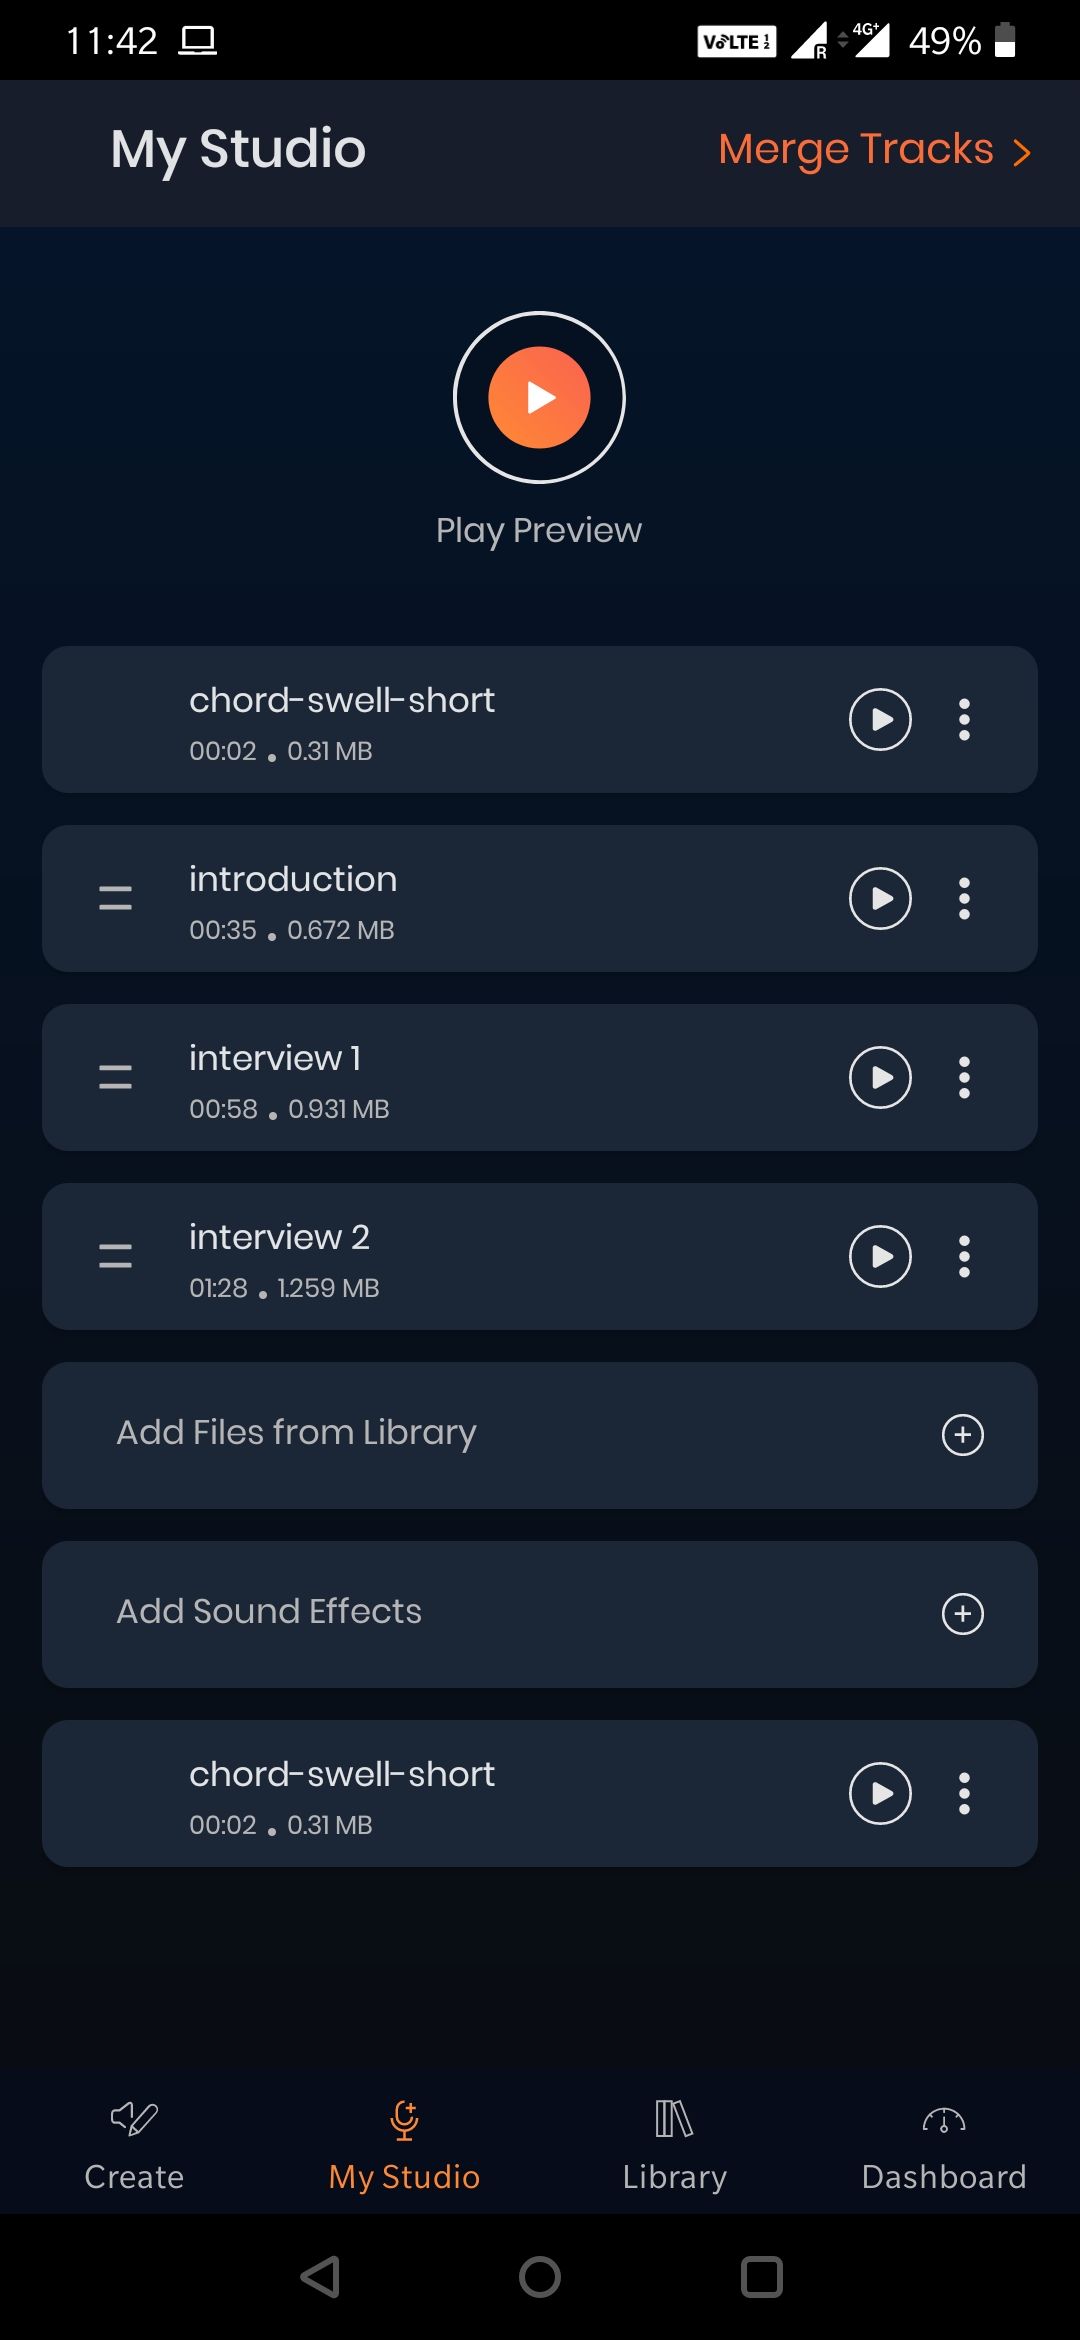
Once done, tap on 'merge tracks' to merge the project into a single audio file. Above is an example of how your file project can look like.
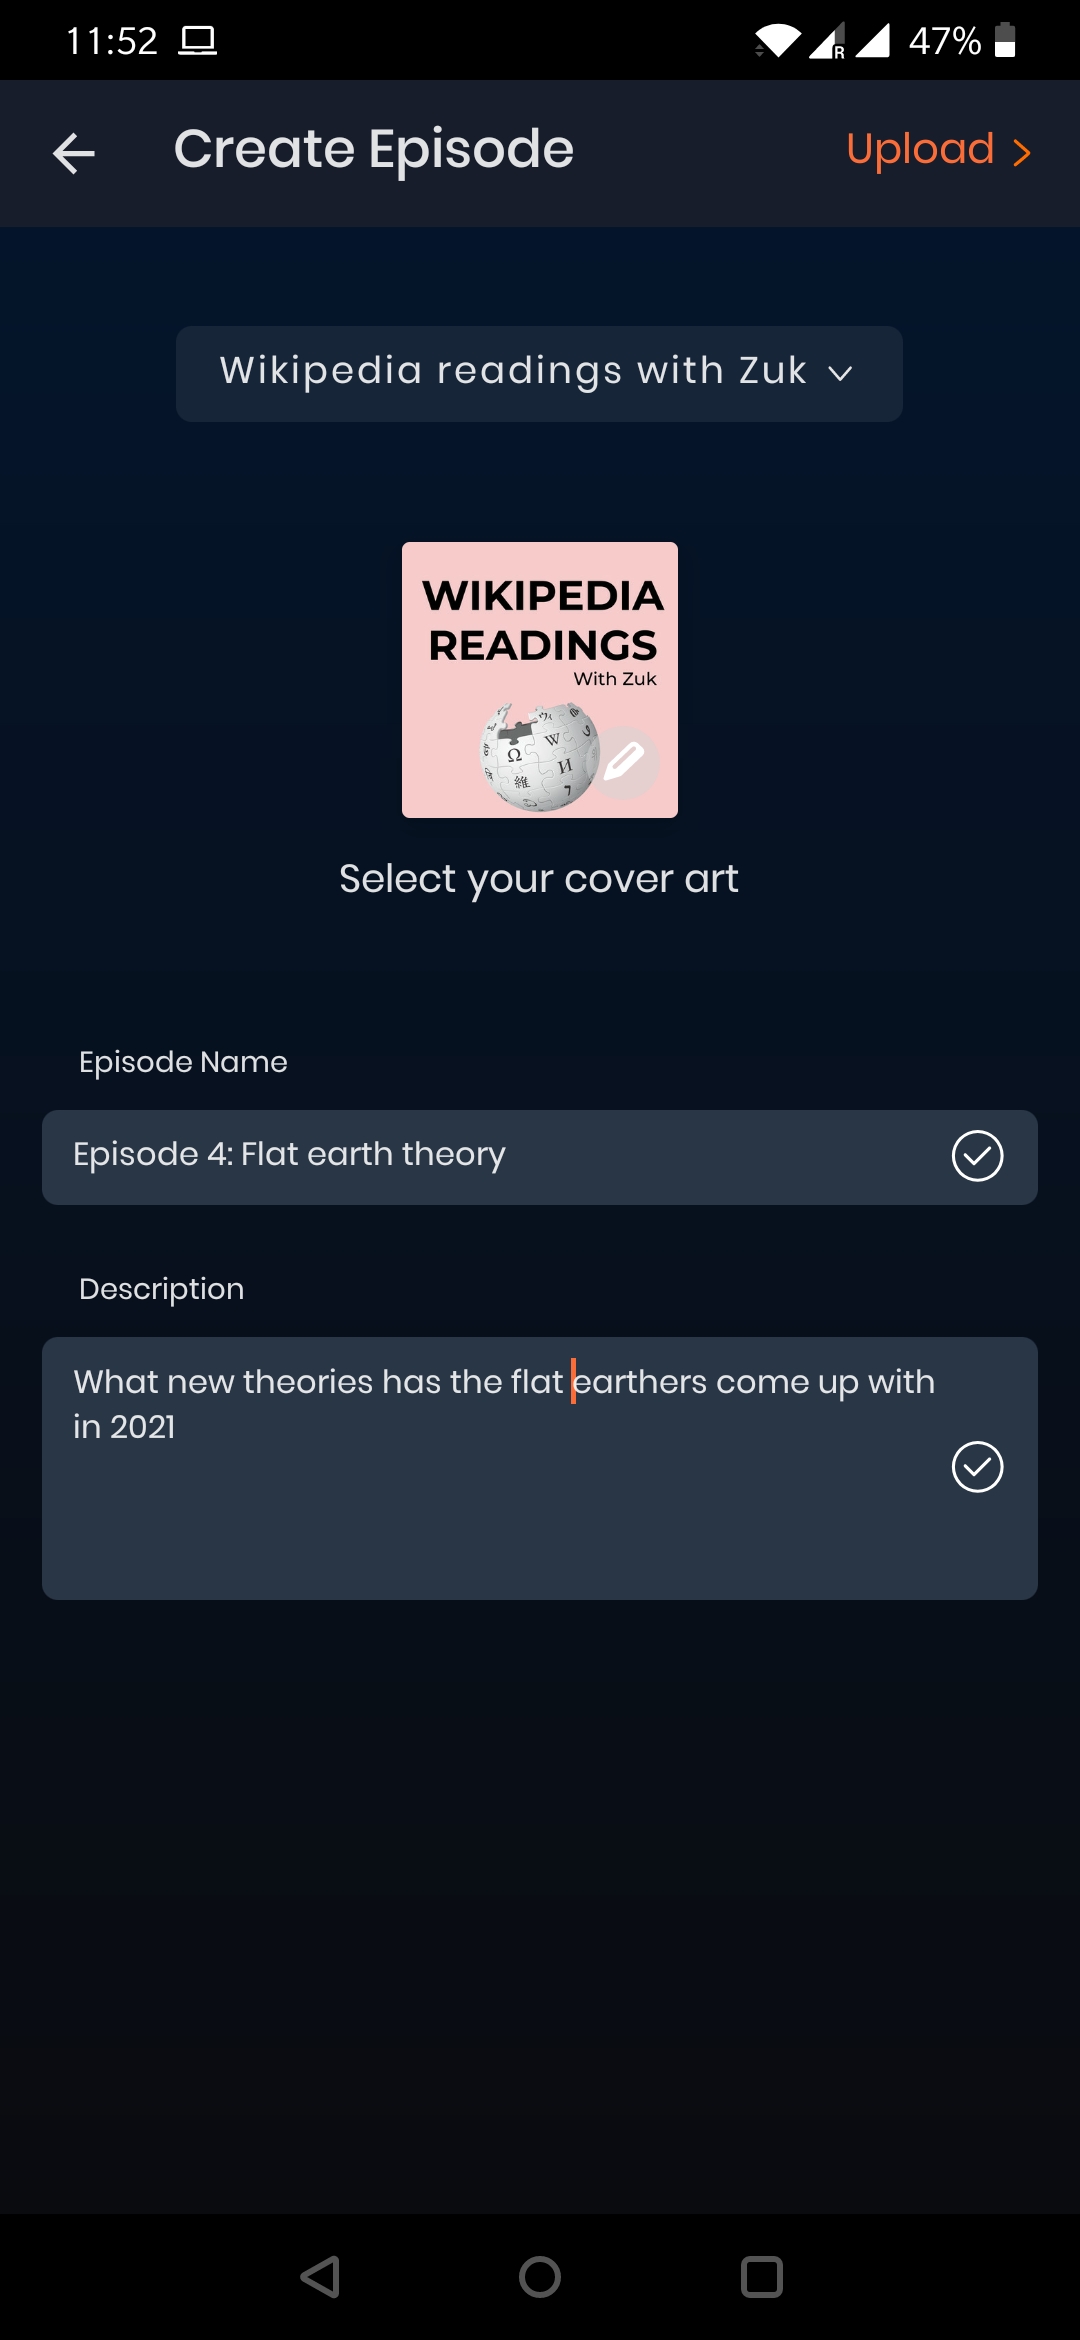
There you go, your episode is now ready to be uploaded and published live. Now simply add your episode details and upload it.

Comments
0 comments
Please sign in to leave a comment.